
Key Takeaways
Trench composting is a sustainable method to enrich soil with nutrients directly where your plants grow.
You can start trench composting at any time, but autumn is ideal for prepping summer crop beds.
Almost all kitchen scraps and yard waste can be used, avoiding meats, oils, and diseased plants.
A typical trench for composting is about 30-60cm deep and as long as needed for your garden space.
By following simple steps, you can improve your soil’s moisture retention and support a thriving garden ecosystem.
Unlock the Potential of Your Garden Soil
Ever wondered how you can give back to the earth and reward your garden at the same time? I’m going to share a secret that’s as old as gardening itself, yet often overlooked in our modern rush for quick fixes. It’s called trench composting, and it’s a game-changer for anyone who loves their garden and our planet.
What Is Trench Composting?
Trench composting is like a treasure hunt, where your kitchen scraps and garden waste are the gold. Instead of tossing these riches into the trash, you bury them in a trench right in your garden. Over time, they break down and transform into a treasure trove of nutrients for your plants. It’s composting made simple, with no need for fancy equipment or turning piles. Just dig, drop, and let nature do the rest.
Why Trench Composting Is a Game-Changer
Imagine cutting down on your household waste, skipping the effort of maintaining a compost pile, and boosting your garden’s health all at once. That’s what trench composting offers. It feeds the soil from within, encouraging worms and beneficial microbes to thrive. Plus, it’s a stellar way to conserve water, as the organic matter increases the soil’s ability to retain moisture – a big win for any gardener!
Starting Your Trench Compost Journey
Getting started with trench composting is as easy as pie, and I’m going to walk you through it. Whether you’re a seasoned green thumb or just getting your hands dirty for the first time, this method is for you.
Selecting the Perfect Location for Trenches
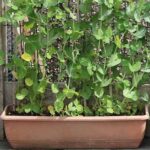
First things first, choose a spot in your garden where you plan to grow hungry plants – those are the ones that love lots of nutrients, like tomatoes, squash, or corn. You’ll want a place that gets plenty of sun and is easy to access for digging. Remember, you’re going to plant right on top of these trenches, so pick a place where your plants will be happy to set down roots.
For example, I once helped a friend transform a barren patch of their backyard into a lush vegetable garden using trench composting. We chose a sunny spot, away from large trees that might compete for nutrients, and by the following summer, the results were incredible – the tomatoes were the juiciest I’d ever tasted!
Now, let’s get our hands dirty and dig into the details of trench composting.
Step 1: Dig the Trench
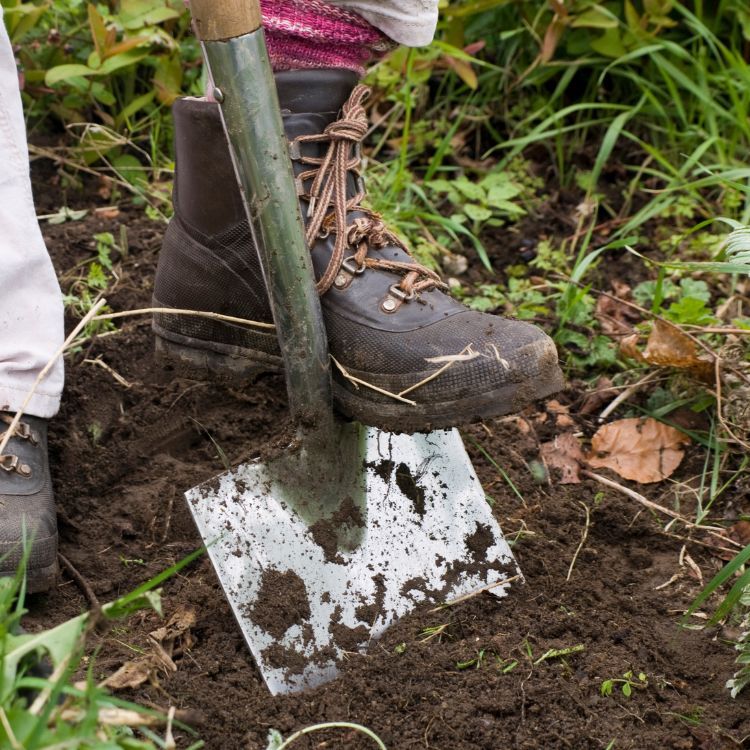
Grab your shovel because it’s time to start digging! You’ll want to create a trench about 30-60cm deep. The width can vary, but I usually go for about 60cm, so there’s plenty of room for the organic material. Make the trench as long as you need, depending on how much material you have and the size of your garden. If you’re working with limited space, don’t worry; even a small trench can have a big impact.
As you dig, pile the soil you remove to the side of the trench. You’ll use this soil later to cover your compost. If you come across any large rocks or roots, remove them – you want your compost to have a smooth transition into the surrounding soil.
In my early days of gardening, I learned a valuable lesson: always mark where you’ve dug your trenches. One year, I forgot, and I ended up accidentally digging up part of my composting area while planting spring bulbs. It was a mess, but it taught me to keep a garden map – a simple sketch works wonders for avoiding mishaps!
Now that you have your trench, you’re ready for the next step. But before you move on, give yourself a pat on the back. You’ve taken the first step towards a more fertile and sustainable garden.
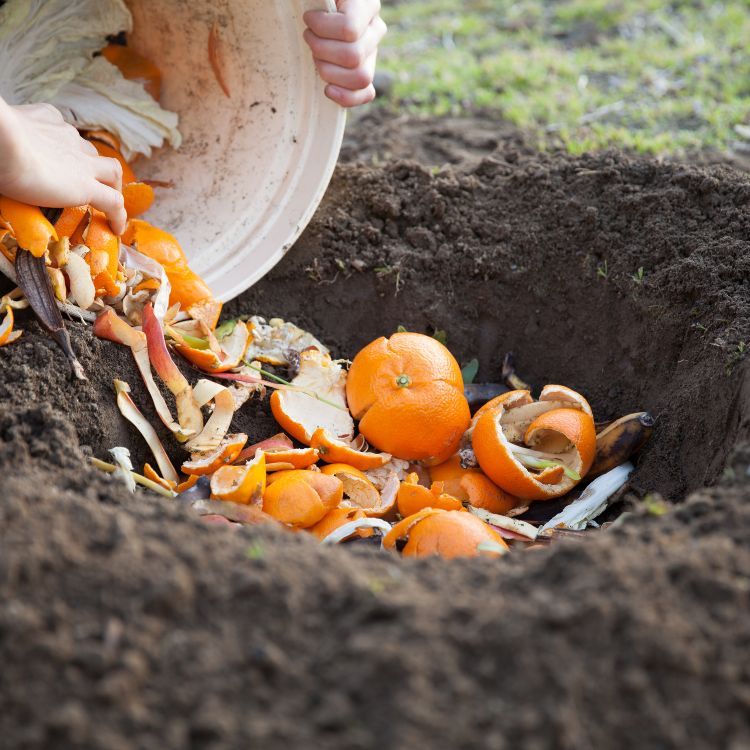
Step 2: Add Organic Matter
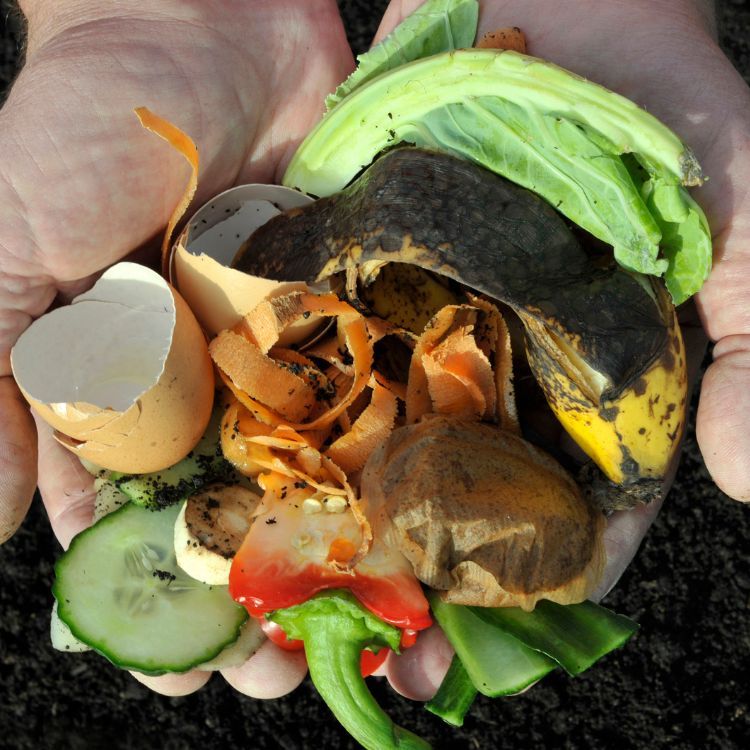
It’s time to fill that trench with kitchen scraps, yard waste, and any other organic matter you can get your hands on. Think fruit and vegetable peels, coffee grounds, eggshells, and grass clippings. Just remember to avoid meats, dairy, and oils, as they can attract pests and take longer to break down.
Layer your materials as you add them, mixing green materials (like kitchen scraps) with brown materials (like dry leaves). This helps to balance the nitrogen and carbon in your compost, which is like creating the perfect meal for the microorganisms that will break it all down.
Step 3: Cover and Let Nature Do Its Work
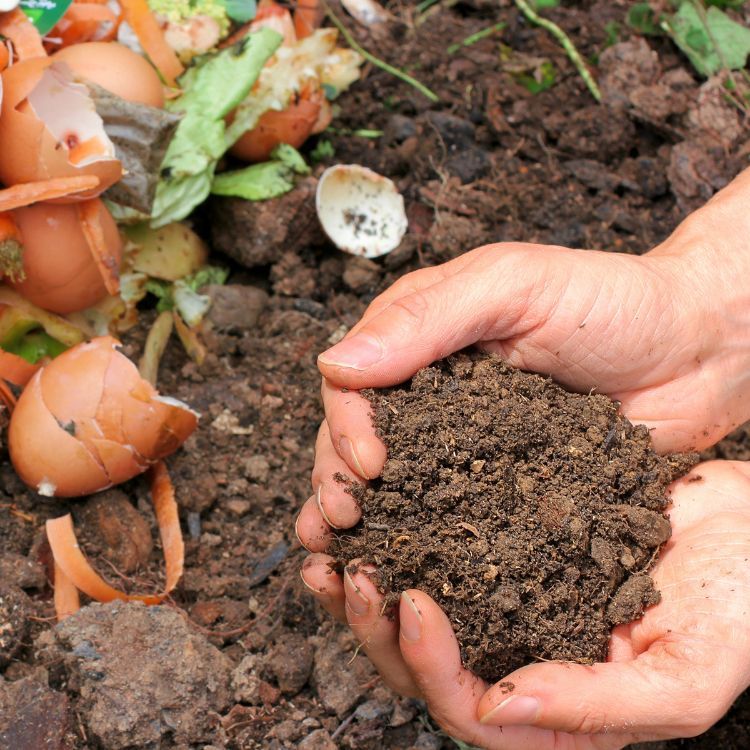
Once you’ve added all your compostable materials, it’s time to tuck them in. Take the soil you set aside earlier and cover the trench. I like to add an extra 5-10cm of soil on top because the composted material will settle over time. Give the area a good watering to help kick-start the decomposition process.
Now, nature takes over. Microorganisms and earthworms will work their magic, breaking down the organic matter and turning it into rich, fertile soil. This process can take a few months to a year, depending on your climate and the materials you’ve used.
Maximizing Your Composting Efforts
For the best results, try to keep a balance of green and brown materials in your trench. If you add a lot of kitchen scraps, balance it out with some dry leaves or shredded paper. This keeps the composting process efficient and helps to avoid any unpleasant odors.
Another tip is to chop or shred your organic materials before adding them to the trench. Smaller pieces break down faster, which means your compost will be ready sooner. Plus, it’s much easier for the microorganisms to work their magic on smaller bits.
Timing Your Trench Composting for Optimal Results
While you can start trench composting any time of year, the best time to begin is in the fall. This allows the compost to break down over the winter, and by spring, you’ll have nutrient-rich soil ready for planting. If you’re an avid gardener, consider rotating your trenches each year, so different parts of your garden get the benefit of the compost.
Common Pitfalls and How to Avoid Them
One common mistake is adding too much material at once, which can slow down the decomposition process. It’s better to add smaller amounts more frequently. Also, be sure to bury your organic matter deep enough to deter pests and avoid any unwanted smells.
Another pitfall is forgetting to water your trench, especially during dry spells. Just like any compost, your trench needs moisture to break down effectively. So, give it a drink every now and then, just like you would your plants.
From Waste to Wealth: The Impact of Trench Composting
By using trench composting, you’re not just feeding your plants; you’re creating a sustainable cycle that reduces waste and enhances your soil’s health. It’s a powerful way to take your gardening to the next level and do something good for the environment.
Plus, you’re building a habitat for beneficial creatures like worms and microbes, which are essential for a thriving garden ecosystem. They aerate the soil, help control pests, and continue to enrich the earth long after your compost has broken down.
Improving Soil Fertility
The beauty of trench composting is in the rich, dark soil it creates. This improved soil structure not only holds moisture better but also provides a steady supply of nutrients to your plants. It’s like giving your garden a multivitamin that keeps on giving, season after season.
And there you have it, a complete guide to trench composting. With a little effort and patience, you can transform your garden waste into black gold and watch your garden thrive. So why wait? Get started today and make the most of every scrap.
By now, you’re well on your way to mastering the art of trench composting, a simple yet powerful method to nourish your survival garden. But let’s dive into some practical tips and address common questions to ensure your success.
FAQ
How Long Does Trench Composting Take?
The breakdown time in trench composting can vary depending on a few factors like climate, types of organic material, and soil composition. Typically, it takes about 3 to 12 months for the material to fully decompose. In warmer climates, the process is quicker due to higher microbial activity. In cooler climates, it might take a bit longer, but rest assured, the magic is still happening beneath the surface.
Can I Use Trench Composting for Raised Beds?
Absolutely! Trench composting can be a great asset for raised bed gardens. Simply follow the same steps: dig a trench within your raised bed, fill it with organic waste, and cover it with soil. This method will enrich the soil in your raised beds, leading to healthier, more robust plants.
What Types of Waste Should Not Be Included in a Trench Compost?
While most organic waste is fair game, there are some things you should avoid adding to your trench compost:
Meat and dairy products – These can attract pests and cause odors.
Fats and oils – They break down slowly and can disrupt the composting process.
Diseased plant material – You don’t want to risk spreading diseases to your plants.
Chemically treated wood or yard waste – Chemicals can harm beneficial soil organisms.
How Deep Should My Trench Be?
Your trench should be about 30-60cm (12-24 inches) deep. This depth allows for sufficient coverage of the compost material, which minimizes odors and prevents attracting animals. Plus, it’s the sweet spot for roots to access the nutrients as they break down.
“Remember, the goal is to feed the soil, which in turn feeds the plants. Trench composting is an investment in the health of your garden that pays off with vigorous growth and bountiful harvests.” – A Seasoned Gardener
Is Trench Composting Suitable for Cold Climates?
Yes, trench composting can be done in cold climates. While the composting process may slow down in the winter, it doesn’t stop. The material will continue to decompose, albeit at a slower pace, and come spring, it will be ready to nourish your plants. If you live in a particularly cold area, consider starting your trench compost in the late summer or early fall to give it a head start before the freeze.
As we wrap up, let’s remember that trench composting isn’t just a method; it’s a commitment to nurturing your garden and the environment. It’s about turning waste into wealth and allowing nature to flourish in your backyard. So, grab that shovel, save those scraps, and take the next step toward a greener, more sustainable world.
And if you’re eager to jumpstart your journey to a self-sufficient garden, check out Survival Essentials’ Ultimate Heirloom Seed Vault. With 144 varieties of seeds, you’ll have everything you need to grow a thriving, resilient garden that can weather any storm. Get started today and sow the seeds of sustainability for generations to come.


Leave a Reply