

Key Takeaways
Hardening off seedlings is essential for transitioning them to outdoor conditions.
Start with short outdoor exposures and gradually increase the duration over 7 days.
Monitor weather conditions closely to protect seedlings from extreme elements.
By day 7, seedlings should be ready for transplanting into the garden.
Quality seeds and proper care are key to developing a resilient survival garden.
Why Hardening Your Seedlings is Crucial
Think of hardening off your seedlings as a boot camp for plants. It’s a period where they build toughness and adapt to the harsh realities of outdoor life. Without this crucial step, your tender plants are like new recruits thrown into the battlefield unprepared—they might survive, but the odds aren’t in their favor.
The Importance of Acclimating Seedlings
When seedlings grow indoors, they live in a world of constant temperatures, limited airflow, and filtered light. Moving them outdoors without a transition period can shock them, stunting growth or even causing death. Acclimating seedlings gradually exposes them to wind, sun, and varying temperatures, which strengthens their stems and reduces transplant shock.
Risks of Skipping the Hardening Process
Skipping the hardening process can lead to a variety of setbacks. Your plants might wilt, leaves could turn yellow or brown, and growth can be severely stunted. In the worst-case scenario, the plants could die, wasting all the time and effort you put into nurturing them from seeds.
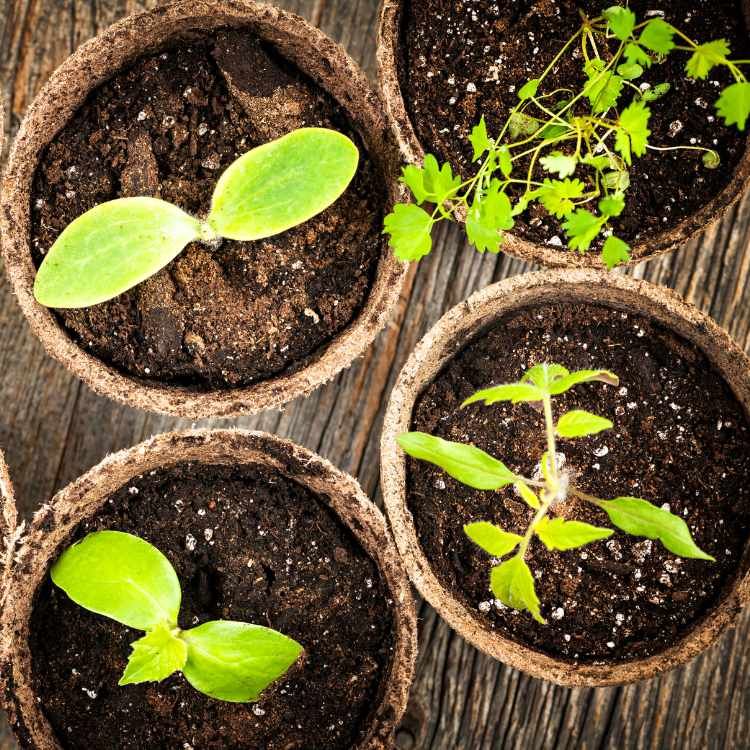
Day 1: Setting the Stage for Success
The first day of hardening off is about easing your seedlings into a new environment. It’s like the first day at a new school—introduce them gently to make the transition as smooth as possible. For more information on preparing your plants, see our guide on plant hardiness zones.
Material Preparation
Before taking your seedlings outside, make sure you have the right materials. You’ll need a sheltered spot, like a porch or under a tree, where seedlings can get indirect sunlight. Also, have some lightweight fabric or a screen handy to protect them from intense sun or strong wind.
First Exposure: Timing and Duration
On day 1, take your seedlings outside for just 1-2 hours. Choose a cloudy day or a time when the sun isn’t at its peak. This short period is enough to start the adaptation process without overwhelming your young plants.
As you move into the middle of the week, your seedlings are becoming more accustomed to the outside world. It’s a delicate balance between exposing them to the elements and providing them protection. The goal is to increase their resilience day by day.
Partial Shade to Full Sun Transition
By day 4 and 5, your seedlings should start spending some time in direct sunlight. Begin with periods of 30 minutes to an hour, preferably during the morning when the sun’s rays are gentler. This exposure will help them produce the necessary chemicals to protect themselves from UV rays.
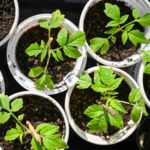
Day 6: Evaluating Progress
After nearly a week of hardening off, your seedlings should be showing signs of increased sturdiness. Their stems will be thicker, and they’ll bounce back from wind and sun exposure more quickly. This is the time to take stock of how each plant is responding to the process.
Keep a close eye on your plants. Are they standing tall, or are they still drooping after their time outside? This will give you a clue as to whether they’re ready for the big move or need a bit more time to toughen up.
Remember, each plant is an individual. Just like people, they may not all adapt at the same pace. Adjust your care accordingly, giving extra attention to those that seem less prepared.
On this day, you should also be preparing for the possibility of unexpected weather changes. If a cold snap or heat wave is on the horizon, you may need to adjust your hardening schedule to protect your plants.
Signs of Successful Acclimation
By day 6, you should be seeing:
Sturdier stems that can withstand gentle breezes
Leaves that are more robust and less prone to wilting
A general appearance of vigor and health
If you’re not seeing these signs, it’s okay to extend the hardening off period by a few days. The goal is to ensure that your plants are strong enough to thrive once they’re in the ground.
Adjusting the Hardening Schedule as Needed
Flexibility is key. If your seedlings are looking particularly strong, you might extend their outdoor time by an extra hour or two. On the other hand, if they seem to be struggling, cut back the duration and make sure they’re well-watered and protected from strong sun or wind. For more detailed strategies, consider reading about nurturing your garden while traveling, which can offer insights into adjusting care based on different conditions.
Day 7: Final Preparations for Transplant
Day 7 marks the end of the hardening off period and the beginning of a new chapter for your seedlings. They’re almost ready to be transplanted into your garden, where they’ll grow into strong, productive plants.
Preparing the Garden Bed
Ensure your garden bed is ready to welcome the new arrivals. The soil should be loose, well-draining, and rich in organic matter. If you haven’t done so already, now is the time to mix in compost or aged manure to give your plants a nutrient-rich environment.
Transplanting Tips for Hearty Growth
When transplanting, be gentle with your seedlings. Handle them by the leaves, not the stems, to avoid damage. Plant them at the same depth they were growing in their containers and water them in well. A layer of mulch can help retain moisture and regulate soil temperature as they adjust to their new home.
Year-Round Care for Enduring Plant Health
Even after your seedlings are safely in the ground, your job as a gardener isn’t over. Ongoing care is what will turn your survival garden into a source of abundant harvests.
Maintaining Soil Quality
Healthy soil is the foundation of a productive garden. Regularly add organic matter, maintain a balanced pH, and ensure your soil is well-aerated. This will support your plants’ growth and help them resist pests and diseases.
Additionally, consider crop rotation and companion planting as strategies to keep your soil healthy and your plants thriving. These techniques can reduce the likelihood of disease and improve overall garden health.
Regular Plant Health Checks
Keep a watchful eye on your plants throughout the growing season. Check for signs of stress, such as discolored leaves or stunted growth, which could indicate nutrient deficiencies or pest problems. Early detection is crucial for addressing these issues before they become serious.
Remember, a resilient garden is the result of careful planning, patience, and consistent care. With these elements in place, you’ll be well on your way to enjoying a bountiful harvest and the peace of mind that comes with self-sufficiency.
Quality Seeds Selection at Survival Essentials
For those serious about building a survival garden, the journey begins with the right seeds. Survival Essentials offers a curated selection of heirloom seeds, non-GMO, and open-pollinated varieties that are essential for a resilient garden. With seeds that have stood the test of time, you’re not just planting a garden; you’re preserving a legacy of biodiversity.
Protective Gear for Delicate Seedlings
Shade cloth to protect from intense sunlight
Windbreaks such as screens or temporary walls
Row covers for overnight temperature drops
Garden fleece to safeguard against pests
Seedlings are vulnerable and need the right gear for protection. Shade cloth can prevent sun scorch, while windbreaks help prevent stem breakage. Row covers and garden fleece can shield your young plants from frost and pests. These tools are your seedlings’ armor against the elements.
Remember, the goal is to create conditions that challenge the plants just enough to stimulate growth without causing damage or stress. The right gear can make all the difference in helping your seedlings transition smoothly from the safety of indoors to the great outdoors.
Most importantly, as your seedlings grow and face the elements, you’ll see them transform. What was once a fragile green shoot will become a robust plant, capable of withstanding the vagaries of weather and pests, all thanks to your careful preparation and the protective gear you’ve provided.
Therefore, investing in quality protective gear is not an expense; it’s an investment in the health and productivity of your survival garden.
Frequently Asked Questions (FAQ)
As a gardener, you’ll always have questions, especially when it comes to the delicate process of hardening off your seedlings. Here are some answers to the most commonly asked questions to help you navigate this crucial stage of your plants’ lives.
Can I Harden Seedlings of Any Plant Variety?
Absolutely! Every plant variety can benefit from hardening off, though the process may look slightly different for each. The key is to understand the specific needs of your plants and adjust the hardening schedule to suit them.
Some plants, like tomatoes and peppers, might need a bit more coddling, while hardier varieties like kale and broccoli can handle more exposure sooner. The principles of hardening off apply universally, but the application should be tailored to your garden’s inhabitants.
Because the needs vary, it’s wise to do a bit of research on each plant type you’re growing. This ensures that you’re providing the right conditions for each to thrive.
Tomatoes: Start with two hours of morning sun, gradually increase exposure
Kale: Can handle cooler temperatures and longer periods outside earlier on
Peppers: Similar to tomatoes, but watch for signs of wilting and adjust accordingly
By understanding the nuances of each plant, you’ll ensure a smoother transition to the outdoors for your entire garden.
How Do I Adjust the Schedule for Cold Weather Plants?
Cold weather plants like spinach, peas, and lettuce can generally handle cooler temperatures, so you might start hardening them off earlier in the spring. Begin with a couple of hours in the shade on a mild day and gradually increase their exposure to sun and cooler temperatures.
Keep in mind that a sudden drop in temperature can still harm these plants. Always be ready to cover them or bring them in if a frost is predicted. It’s this careful attention to weather patterns that will ensure your cold-weather crops get the best start possible.
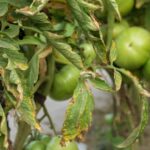
What If My Seedlings Wilt During the Hardening Process?
Wilting is a sign that your seedlings are stressed. This could be due to too much sun, wind, or a drastic change in temperature. If this happens, give them a good watering and bring them back indoors or into a shaded area to recover.
Don’t be discouraged; wilting is part of the learning curve. Use it as a cue to adjust your hardening off schedule. Perhaps shorten their outdoor stays or provide more shade until they show signs of recovery and resilience.
Is There a Best Time of Day for Hardening Off Seedlings?
The best time to start hardening off is in the morning when the sun is gentle and the temperatures are moderate. This gives your seedlings a chance to experience the daylight and gradually warm up with the day. For more detailed guidance, check out our seed survival guide for urban gardens.
Avoid midday sun initially, as it can be too intense. As your seedlings get used to the outdoors, you can gradually expose them to stronger sunlight and longer days outside.
How Do I Ensure My Transplanted Seedlings Thrive Post-Hardening?
Once your seedlings are hardened off and transplanted, it’s crucial to maintain consistent care. Water them regularly, especially during dry spells, and keep an eye out for pests and diseases. Mulching can help conserve moisture and keep the soil temperature stable.
Also, consider companion planting as a strategy to naturally deter pests and diseases. For example, planting marigolds among your vegetables can help repel harmful insects.
Example: A gardener noticed that her tomato plants thrived when she planted basil nearby. The basil seemed to repel certain pests, and the tomatoes were healthier as a result.
By continuing to provide the right conditions and monitoring your plants’ needs, you’ll help them grow into strong, productive members of your survival garden.


Leave a Reply