
Hot composting is not just a method; it’s a journey into transforming your kitchen scraps and yard waste into nutrient-rich gold for your garden. It’s about embracing sustainability and giving back to the earth. And it’s easier than you might think. Let’s dive in and get our hands dirty, shall we?
Key Takeaways
Hot composting is a quick and efficient method to turn organic waste into rich soil.
The right balance of brown and green materials is crucial for a successful hot compost.
Maintaining the right temperature is key to speeding up the composting process.
Regular turning and moisture control are essential for a healthy compost pile.
Hot composting not only reduces waste but also enriches your garden and helps the environment.
Thrive with Heat: Mastering Hot Composting in Your Survival Garden
First things first, hot composting is about creating a thriving environment for microbes to break down organic matter quickly. It’s like cooking, but instead of pots and pans, you’re using greens, browns, and a bit of elbow grease.
Convert Waste to Gold: Hot Composting Basics
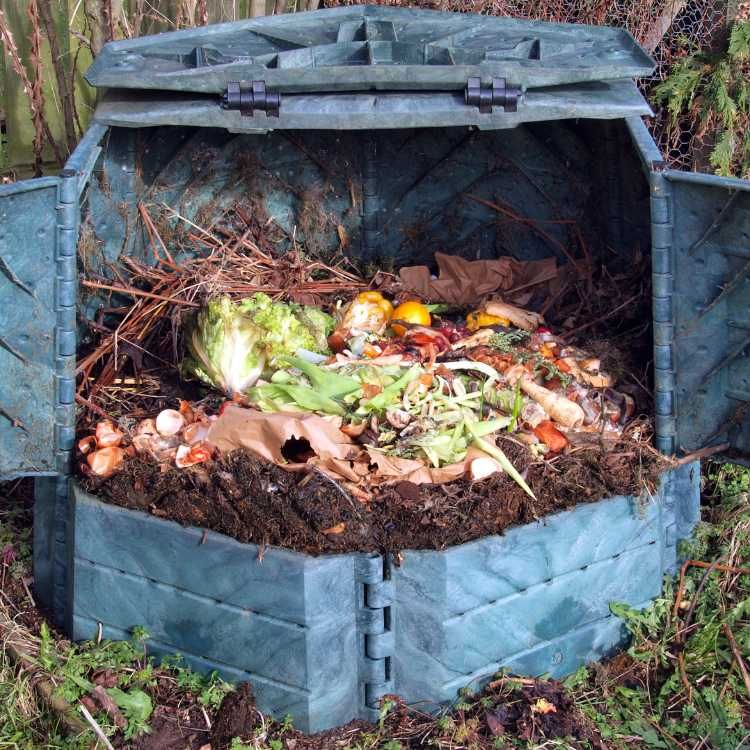
Imagine turning your everyday waste into something that feeds your plants and nurtures your garden. That’s the magic of hot composting. You start with a mix of nitrogen-rich ‘green’ materials like vegetable peels, and carbon-rich ‘brown’ materials such as dried leaves. Together, they create the perfect environment for microbes to thrive and break down the material into compost.
Balance is Key: Brown and Green Materials
Getting the right mix of browns and greens is like baking a cake – you need the right proportions for success. Too many greens, and your compost will be a smelly, slimy mess. Too many browns, and the decomposition process will crawl at a snail’s pace. What you want is a balanced mix that encourages rapid breakdown while keeping odors at bay.
Green materials provide nitrogen – think of them as the protein that feeds the microbes.
Brown materials supply carbon – these are the carbs that give the microbes energy.
A good rule of thumb is to aim for a ratio of about 3 parts browns to 1 part greens. If you notice your compost pile is getting too wet and smelly, add more browns. If it’s too dry and slow, add more greens.
Temperature Matters: Monitoring Your Compost Pile
The heat in hot composting is a sign that the microbes are hard at work. A compost pile that’s doing its job well will reach temperatures of 130-160°F. That’s hot enough to cook those weed seeds and pathogens, making your compost safe for your garden.
To keep track of the temperature, you’ll want to use a compost thermometer. It’s like taking the pulse of your compost pile, ensuring it’s healthy and active. If the temperature dips, it might be time to turn the pile or adjust the moisture level.
Building the Foundation: Setting Up Your Hot Compost Pile
Choose the Right Location
Location is everything. You want a spot that’s convenient for adding materials and turning the pile, but also out of the way enough that it won’t be a nuisance. Look for a spot with good drainage to prevent waterlogging and one that’s not directly under trees where roots could interfere. For more insights on setting up your compost in an urban setting, explore our guide on how to cultivate your city oasis.
Choose a flat, well-drained area.
Make sure it’s a convenient spot for adding waste and turning the pile.
Avoid placing your pile against wooden structures to prevent rot.
With the right location, your compost pile will have the best chance to thrive, and you’ll have an easier time managing it.
Layering Your Compost
Layering is a simple yet effective way to build your compost pile. Start with coarse brown material at the bottom to improve airflow. Then, add a layer of green material, followed by a thin layer of soil or finished compost. This soil layer introduces the necessary microbes to kickstart the decomposition process.
Begin with a layer of browns, like straw or leaves, for airflow.
Add a layer of greens, like vegetable scraps or grass clippings.
Top it off with a thin layer of soil or finished compost.
Repeat these layers until your pile reaches about 3 to 4 feet high. This size is ideal for retaining heat while still being manageable to turn.
Perfecting the Pile: Size and Shape Considerations
The size and shape of your compost pile are more important than you might think. A pile that’s too small won’t hold enough heat, and one that’s too large can become difficult to turn. The sweet spot? A pile that’s about 3 feet wide by 3 feet high. This size is large enough to retain heat but small enough to manage.
The shape matters too. A cubic or conical pile will help you maintain the pile’s structure and ensure that it heats evenly throughout. Keep the sides a bit looser to allow air to flow into the pile, and flatten the top slightly to catch rainwater.
Remember, the goal is to create a self-contained ecosystem that’s easy for you to manage and ideal for the microbes doing the hard work. With these foundations in place, you’re well on your way to creating black gold for your garden. Let’s keep the momentum going and turn up the heat in part two.
Aeration Techniques
Just like a fire needs oxygen to burn, your compost pile needs air to keep the decomposition process blazing. Without it, your pile will start to stink and the beneficial microbes will suffocate. So, how do you keep the air flowing? Turning your compost pile is the answer. By simply using a pitchfork or a compost turner, you can mix the materials, which adds oxygen and keeps things cooking. Aim to turn your pile every week or so, but if you notice it’s heating up quickly, you might turn it more often.
Moisture Management
Moisture is like the secret sauce of composting. Too little, and the microbes can’t do their job. Too much, and you’ll drown them. You’re aiming for the consistency of a wrung-out sponge. If the pile is too dry, give it a sprinkle with the hose. If it’s too wet, add more brown materials to soak up the excess moisture. Keep an eye on the weather, too. If it’s been raining cats and dogs, cover your pile with a tarp to keep it from becoming a swamp.
Regular Temperature Checks
Keeping a close eye on the temperature of your compost pile is like monitoring the heart rate of an athlete. It tells you how well the pile is performing. With a compost thermometer, check the temperature at different depths and locations within the pile. If you find that the temperature is dropping, it’s time to turn the pile to reintroduce heat-generating oxygen. A steady temperature between 130-160°F means your compost is in the zone, breaking down materials and killing off any unwanted seeds or pathogens.
The Rapid Road to Riches: Fast-tracking Compost Maturity
Now, let’s talk about speed. Hot composting is all about getting that black gold ready for your garden as quickly as possible. With the right conditions – balance of materials, temperature, aeration, and moisture – you can have finished compost in as little as a couple of months. That’s a fraction of the time it takes with cold composting methods. This rapid transformation not only gives you a continuous supply of compost for your garden but also keeps your organic waste from lingering around.
Turn Up the Heat: Accelerating Decomposition
Want to make your compost pile work even faster? Here’s a hot tip: chop or shred your materials before adding them to the pile. Smaller pieces decompose more quickly because they give the microbes more surface area to work on. Also, in the warmer months, you can harness the power of the sun by positioning your pile in a sunny spot. Just remember to balance the extra heat with adequate moisture to keep your pile from drying out.
Spotting Readiness: How to Know When Compost is Mature
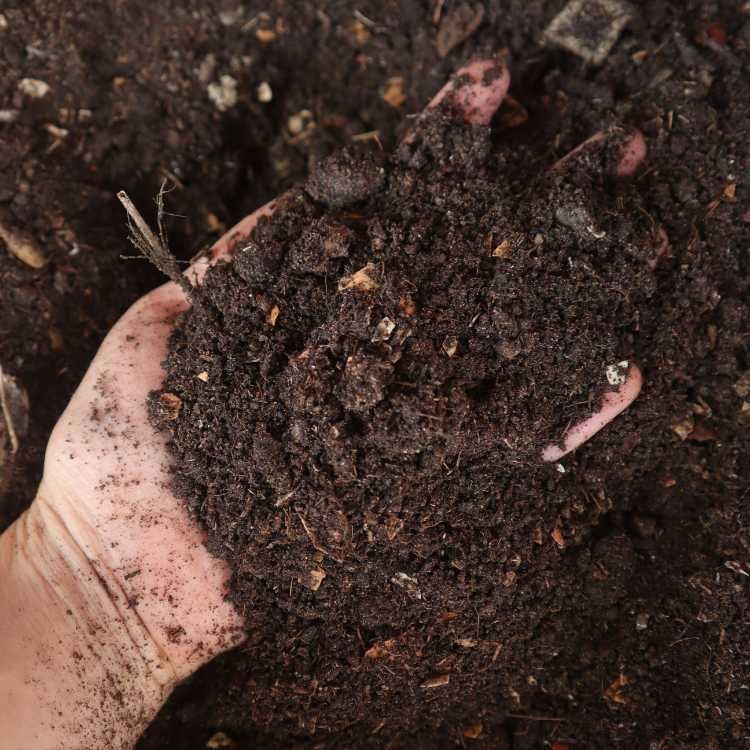
How do you know when your compost is ready to work its magic in the garden? Look for a few key signs: The pile will have shrunk to about half its original size, the original materials will be unrecognizable, and the compost will be dark, crumbly, and smell like the earth after a rain. If you’re not sure, try the bag test: place a small amount of compost in a sealed plastic bag for a few days. If it smells sour or ammonia-like when you open it, it needs more time to mature.
Benefits Beyond Waste Reduction: Why Hot Composting is Essential
Hot composting is more than just a speedy way to deal with your kitchen scraps. It’s a critical tool in the sustainable gardener’s kit. By turning waste into compost, you’re not just reducing what goes to the landfill; you’re creating a product that enriches your soil, supports plant growth, and helps retain moisture. Plus, the heat generated in the process can kill off harmful pathogens and weed seeds, ensuring they won’t spread in your garden.
Nourishing Your Garden: The Nutrient Advantage
Using your hot compost in the garden is like giving your plants a gourmet meal. Full of essential nutrients, it feeds your plants slowly and naturally. It improves soil structure, which helps roots grow strong and deep. It also increases the soil’s ability to hold water, meaning you’ll need to water less. And because it’s made from a diverse mix of materials, it provides a wide range of nutrients, making your garden a robust, nutrient-dense haven for your plants.
Protecting Your Plants: Disease and Pest Control
But it’s not just about feeding your plants. Hot composting can help protect them too. The high temperatures in your compost pile can kill off many plant diseases and pests that could otherwise wreak havoc in your garden. This means less reliance on chemical pesticides and a healthier ecosystem overall. It’s a win-win for your plants and the environment.
Environmental Impact: Beyond Your Backyard
And let’s not forget the bigger picture. By composting, you’re playing a part in reducing methane emissions from landfills, which are a significant contributor to climate change. You’re also conserving water and reducing the need for synthetic fertilizers, which can pollute waterways. In essence, every time you add to your compost pile, you’re taking a small step towards a more sustainable planet.
Hot composting is a powerful tool in the hands of a sustainable gardener. By mastering these techniques, you’re not just disposing of waste efficiently; you’re creating a cycle of life that nourishes your garden, protects your plants, and cares for the earth. Embrace the heat, and watch your garden – and your green thumb – thrive.
The Art of Utilization: Applying Your Finished Compost
After nurturing your compost pile for weeks, the moment of truth arrives – it’s time to harvest and use your black gold. But how can you tell it’s ready, and what’s the best way to use it? Let’s explore the final stages of hot composting and how to make the most of your efforts.
When and How to Harvest Your Compost
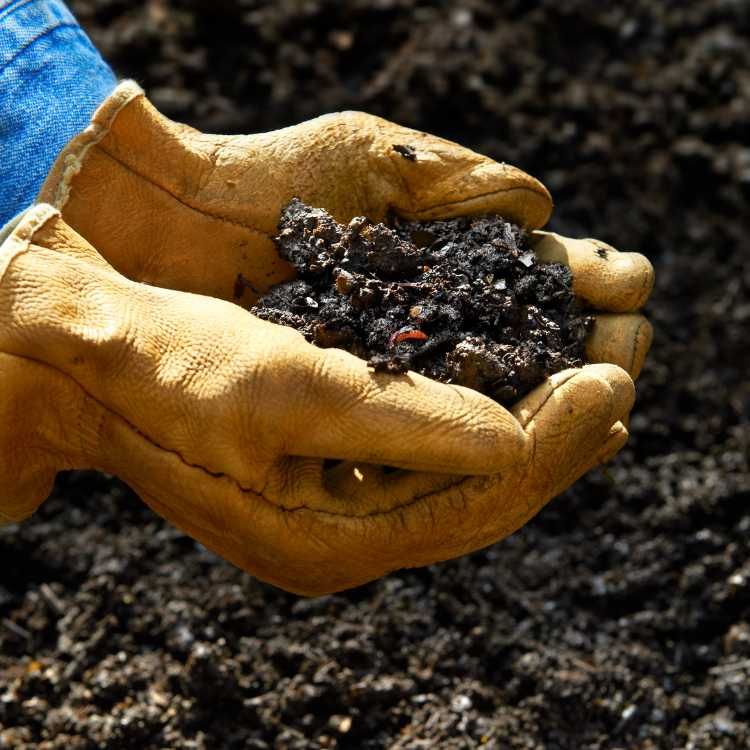
Harvesting your compost is like picking ripe fruit – timing is everything. You’ll know your compost is ready when it looks dark and crumbly, and you can’t recognize the original materials. It should also have a pleasant, earthy smell. To harvest, simply move aside the top layer of partially decomposed material and scoop out the finished compost from the bottom of your pile. Save any unfinished materials to kickstart your next batch.
Application Techniques for Garden Benefit
Now, let’s put that compost to work. There are several ways to apply compost to benefit your garden:
Top-dressing: Spread a layer of compost around your plants to enrich the soil and suppress weeds.
Mixing with soil: When planting new beds, mix compost into the soil to improve its structure and fertility.
Making compost tea: Steep compost in water to create a nutrient-rich tea for watering plants.
Remember, compost is potent, so a little goes a long way. Use it to give your plants a boost without overwhelming them.
Frequently Asked Questions (FAQ)
As you embark on your hot composting journey, questions are bound to pop up. Here are answers to some of the most common queries to help you along the way.
What materials should I avoid adding to my hot compost pile?
While many organic materials are compostable, some should be avoided in a hot compost pile:
Meat and dairy: These can attract pests and cause unpleasant odors.
Oily or fatty foods: Similar to meat and dairy, they can attract animals and slow down the composting process.
Diseased plants: Some diseases can survive the composting process and infect your garden later.
Stick to plant-based kitchen scraps, yard waste, and paper products to keep your compost pile healthy and efficient.
How often should I turn my hot compost pile?
To maintain the heat and speed up decomposition, aim to turn your compost pile every one to two weeks. If it’s particularly hot or you notice the temperature dropping, you might need to turn it more frequently to reintroduce oxygen and reignite the microbial activity.
Can hot composting eliminate all types of seeds and pathogens?
Hot composting can kill many weed seeds and pathogens due to the high temperatures it reaches. However, some particularly hardy seeds and pathogens may survive. To increase the likelihood of their destruction, ensure your pile consistently reaches temperatures between 130-160°F and maintain those temperatures for several days.
What is the ideal temperature range for hot composting?
The sweet spot for hot composting is between 130-160°F. This range is hot enough to break down materials quickly and kill off most weed seeds and pathogens, but not so hot that it kills the beneficial microbes working in your pile.
How does hot composting differ from traditional or cold composting?
Hot composting is all about speed and efficiency. It requires more active management but results in compost much faster than traditional, or cold, composting. Cold composting is a more passive approach, where materials break down over time with minimal intervention. Hot composting, on the other hand, involves regularly turning the pile, monitoring temperature, and balancing materials for rapid decomposition. For those interested in incorporating this method into their survival gardening practices, understanding these differences is crucial.


Leave a Reply